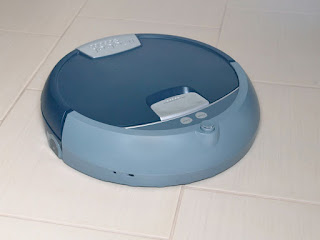
Resuscitating a Scooba
I am not 100% sure where this is going, but it's going to be a fun journey...
I own an iRobot Roomba 630 floor cleaner, and it works well enough for our house. But I discovered the iRobot "Create" which is designed for teaching and hacking in general. As you can imagine, repurposing our cleaning robot for my hobby might not sit too well.
Using the local social networks, I picked up an iRobot "Scooba" for nothing. According to the previous owner, it won't charge and the power light glows red when you plug it in.
I downloaded the service manual from one of those manuals websites, and learned this is likely to mean that the battery has failed and won't hold a charge. I figured I could probably re-pack it and things would be sweet.
As with so many of my projects, the problem was a little more complex than I expected. The reason why it won't charge is that the battery was missing, rather than simply faulty. Given it's a specialised package, this could prove to be expensive.
I then had the brainwave of making one myself and somehow hooking it into the existing wiring. I'm not going to be mopping floors, so being water resistant isn't a high priority.
My first DIY pack consists of twelve 2500mAh "AA" cells as shown in the next photo.
Using a set of alligator clips I connected it to the battery terminals and got an error. Then I re-checked the service manual, and there's a thermistor connected to the other two terminals. Master Instruments make a replacement battery pack, and their catalogue says it's a 5K device. So I strapped a 4K7 resistor across the thermistor terminals, and tried again. Success! For about one minute, then four beeps, meaning the battery is faulty. What gives?
As a test, I replaced my battery pack with a 12V SLA battery and it charged perfectly, so it looks like the charger circuit is functional. But why didn't my pack work?
I hooked it up again, this time with a multimeter to measure the charge current, and there was no current at all. When I put my SLA battery on there, I got about one Amp, so my pack is obviously the problem.
Diving further into the manual, it describes a number of charging phases, including the sixteen-hour "recovery" mode which used 430mA to recover a long-discharged battery. I looked up the specs for the cells I am using, and found that a constant 240mA should do the same time.
It took a while, but my pack eventually did start to charge, so one (or more) of my cells was really flat. When I reconnected it, the charge process worked just fine. Just for fun, I added a DS18B20, and fed the temperatures into Splunk (see below), and the temperature curve matched the service manual.
To make it compatible with the Scooba, I used a zip-tie to hold the thermistor against the centre-most cells, hoping this will give me a sufficiently accurate reading. A decided to also retain the DS18B20 as "my" temperature sensor, and added a 10K/1K voltage divider so that a micro could be used to monitor the pack voltage. This gives me visibility of the battery health outside of the reports I can get out of the serial interface on the robot.
For security, and short-circuit prevention, I wrapped the whole package in vinyl tape. The finished result is shown below. The single orange wire is my voltage divider output.
Because I don't have an original battery case, I still have to figure out the connections in a manner better than alligator clips. More on that in the next installment.


Comments
Post a Comment