Compiling OpenCV with CUDA Support on Windows
I have actively avoided doing this for a while, but now I need to run CUDA-dependent OpenCV Code on a Windows Machine. So it's time to bite the bullet and get it done.
Want to go for a ride? It will be fun, I promise!
Background
This is being run on a Gigabyte Motherboard with a 10th-Generation i7 CPU, 64GB RAM and Windows 11 (Release). You want at least 4GB of RAM and an i5 to do the build with any sort of efficiency.

First, get your pre-requisites
You will need:
- Visual Studio 2019. The free version is just fine. (https://www.visualstudio.com)
- OpenCV and OpenCV-Contrib source code from Github (https://github.com/opencv)
- Python (https://www.python.org)
- CMake (https://www.cmake.org)
- NVIDIA Drivers to suit your GPU (https://www.nvidia.com)
- NVIDIA CUDA libraries and CuDNN version to suit your GPU (https://developer.nvidia.com)
- A pot of coffee or other suitable beverage
Install CUDA, Python, Visual Studio and CMake. Make sure they are in the user path, and that a handler is installed for "sln" files. This should be the case by default.
As a sanity check, run "nvidia-smi" to make sure you can talk to your GPU. On Windows, installing CuDNN involves manually copying files into the CUDA directories, so follow the installation instructions carefully.
If possible, do your build on an SSD, because parts of the process are very I/O heavy.
Configure Everything
Yes, you can use the CMake GUI, but you could also put lit bamboo skewers under your toenails. The command-line is actually easier.
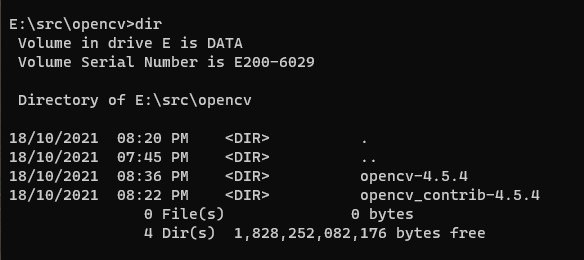
Firstly extract opencv-x.x.x into a directory (E:\src\opencv\opencv-4.5.4 in my case) and then extract opencv_contrib-x.x.x at the same level. You should have two directories thus:
cmake -DWITH_CUDA=YES -DOPENCV_DNN_CUDA=YES -DENABLE_FAST_MATH=YES -DOPENCV_EXTRA_MODULES_PATH=E:\src\opencv\opencv_contrib-x.x.x\modules -DCUDA_FAST_MATH=YES -DCUDA_ARCH_BIN=7.5 ..
All of the above is a single line, so be careful with the copy and paste. Also note that the CUDA_ARCH_BIN value needs to be set according to the GPU in use. You can find a list here: https://en.wikipedia.org/wiki/CUDA.
There are also a load more options you could specify depending on your needs. Please refer to the OpenCV documentation, but the above will get you started.
That will grind away for a while. Take a few sips of your beverage. If all goes to plan, you will have a file "OpenCV.sln" in your build directory.
The Build
Now, open the OpenCV.sln file in Visual Studio". You should simply be able to type "OpenCV.sln" in the command prompt, and Windows will work stuff out for you. You'll have a solution view resembling the following:

Probably a good idea to select "Release" for your build type since there is not too much benefit to building debug binaries in this case

Now, expand "CMakeTargets in the Solution Explorer and choose "ALL_BUILD"

Click "Build" from the right-click menu and take a long draught from your beverage. This is going to take quite a while even on a fast machine. My system took just on 30 minutes to complete.
There's a lot of warnings, but it should build without error. Progress will look like this:

Installation
You're probably onto your second pot of coffee by now, but we're approaching the finish line, I promise...
Select the INSTALL project and choose "build" from the context menu. This will take a couple of minutes to run.
Now try importing "cv2" from within the Python interpreter. If it succeeds, you're done. If this fails, go back and check that CMake detected Python in the first instance.


Comments
Post a Comment